Simple Step-by-Step Chick Drawing for Young Artists
Looking for a fun and simple art activity? This Easy to Draw Chick for Kids guide is perfect for preschoolers and early learners! With just a few basic shapes and lines, children can create an adorable baby chick, building both drawing confidence and fine motor skills. Whether it’s for springtime, Easter, or a farm-themed unit, this drawing is a great way to inspire creativity.
No fancy tools are needed—just paper, a pencil, and some crayons or markers to bring your chick to life!
How to Draw a Chick – Kid-Friendly Instructions
Step-by-Step Guide:
-
Start with the Head
Draw a medium-sized circle for the chick’s head. -
Add the Body
Draw a larger oval under the head for the body, slightly overlapping it. -
Draw the Eyes and Beak
Inside the head, add two small circles for eyes and a triangle for the beak. -
Sketch the Wings
On each side of the body, draw curved shapes to represent the chick’s little wings. -
Add the Feet
Draw two short lines under the body, each ending with three toes. -
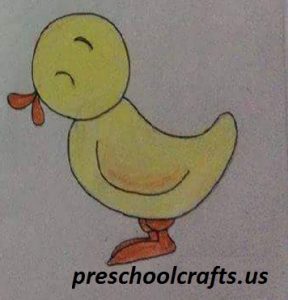
Top It Off with Feathers
Add a few curved lines on top of the head for cute chick fluff! -
Color It In
Use yellow for the body, orange for the beak and feet, and black for the eyes.
This drawing activity is ideal for both home and classroom settings. It strengthens observation and sequencing skills while letting kids express themselves through art.
You can learn how to draw easy chicks in this page.
It’s easy to draw a chick anymore.
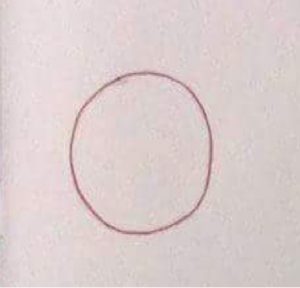
First you draw a circle.
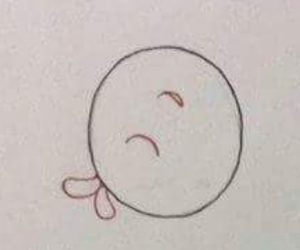
After you draw a chick’s mouth and eyes.
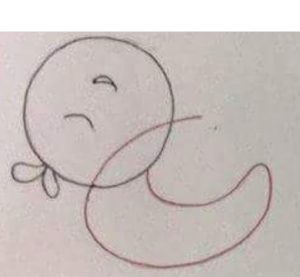
Then you draw the body of the chick.
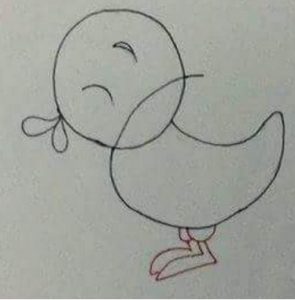
Finally, you draw up the chicks.
Now paint the color you want cute chick.
Discover creative ideas on our Pinterest page.
Follow our latest updates on Facebook.
See daily inspirations on our Instagram profile.
Join our conversations on Twitter (X).